Hi everyone, this is Amy and I’m excited to be sharing my first projects using the wonderful April kits. The colours this month! Oh my! I’ve loved every moment of working with this month’s super bright papers and embellishments. Today I’m doubling up and squeezing two projects into one post: a Project Life layout and a planner DIY. So let’s hop right to it!
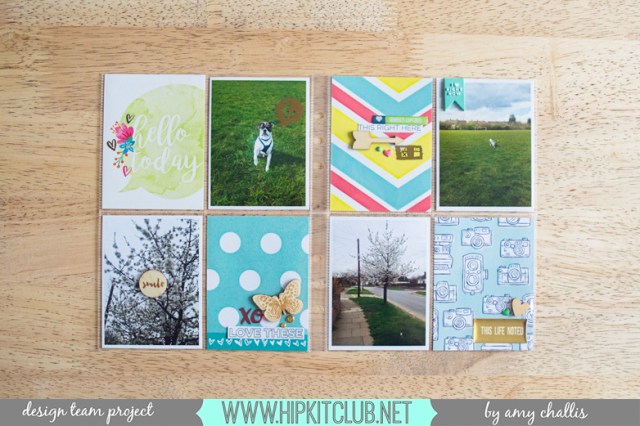
For my Project Life cards, I used a combination of 3×4 cards from the Project Life Kit and papers from the Main Kit. When using papers, I like to cut a bunch up into 3×4 cards before I begin so that I can move them around until I get a great fit for my photos. For the bottom left hand card, I made sure to include the patterned strip along the bottom of the paper for a little added interest. All 12×12 papers have a border at the bottom, so why not use it as a feature?

Next I added the ‘Love these’ phrase which I’d cut out from a piece of Elle’s Studio paper from the Main Kit. After that I went straight for the wooden butterfly and filled in the gaps either side with a rub on transfer and enamel dots to create a cluster.

I created another cluster here using another cut out, rub on, wooden piece and enamel dots. Very much in the same way as before, I started out with the phrase and arranged the other small pieces around it. I finished this card off with a shiny epoxy sticker from Pinkfresh Studio. Simple!

I dotted around a few other embellishments whilst trying to keep the layout balanced. I find it easy, especially when working in 6×8, to overload my page with ‘bits’. I decided to stick with two heavily (for minimalist me!) embellished cards, or moderately and then a sprinkle on top of the photographs. Game changer of the month: Amy Tangerine Rub-Ons. I’m usually a stamper, but these work just as well and come in some fantastic shapes and colours!

I used a few rub on hearts on the ‘hello today’ card just to give it a little sparkle. I really love the way it turned out. Oh, and my dog says hi 🙂

For my second project, I created a new dashboard and two folders for my A5 sized planner. Girls, creating your own dashboard using the Main, Project Life and Embellishment kits is so fun and easy! I simply used my old dashboard as a template to cut a new one from 12×12 paper and then layered other papers and embellishments.

Yes, I also stuffed the pockets full of goodies from the April kits! The paperclips are just perfect for keeping tabs on certain pages and generally holding bits and pieces together. I also put in some 3×4 cards for scribbling notes on and stickers and ephemera for decorating whist on the go!


I created two pockets for holding stickers and notecards, one slightly smaller than the dashboard and one even smaller still. I measured and cut out a simple ‘L’ shape for the pockets; you could unfold a similar pocket to draw around or even use your silhouette for this. I stuck the flaps down with double sided tape and decorated with a range of embellishments, focusing again on the small details.

The pockets are great for slipping little bits into and give your planner a little extra bulk and a ‘scrappy’ feel. You might want to use pockets to keep photographs in, sticky notes, reminders or even receipts or your Starbucks reward card!

Thanks for stopping by. Happy scrapping and happy planning, everyone!

Very nice.. everything about it 🙂